rule

More Ballroom Bustles

rulef

Visit Our NEW site at: LeannaStudios.com

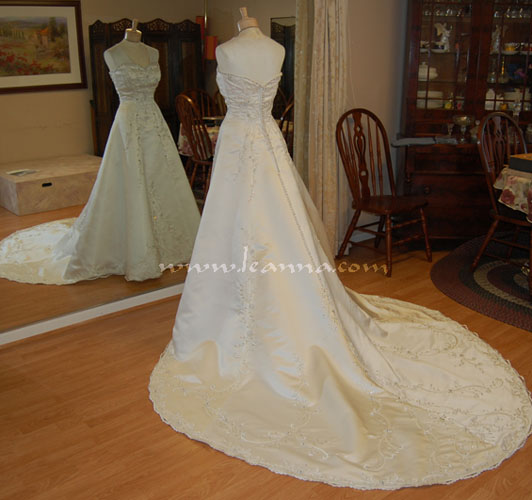
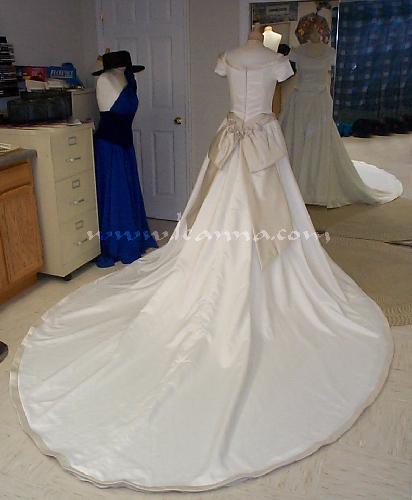
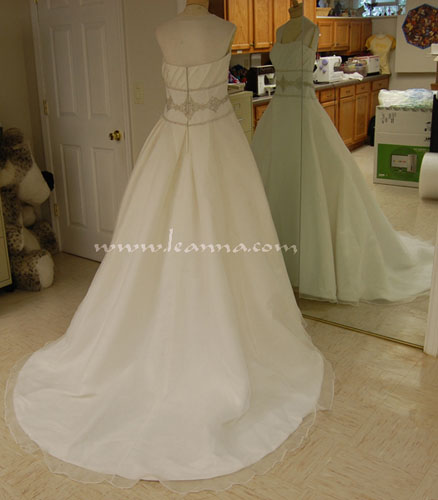
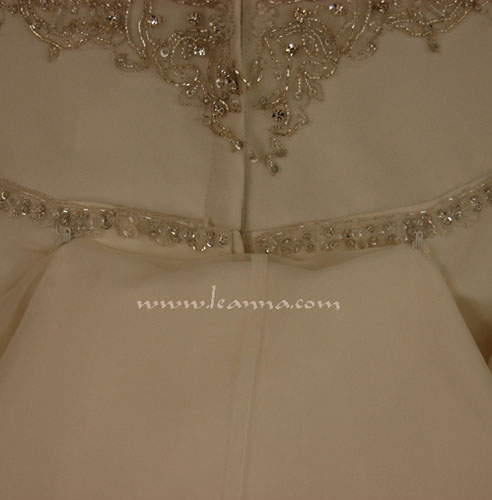
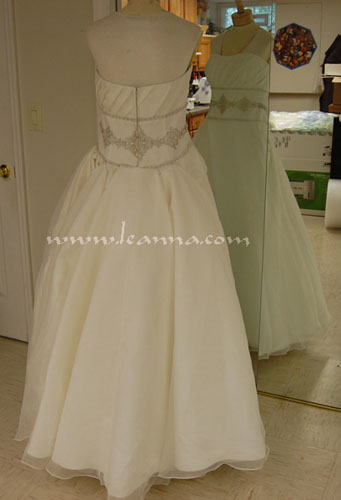
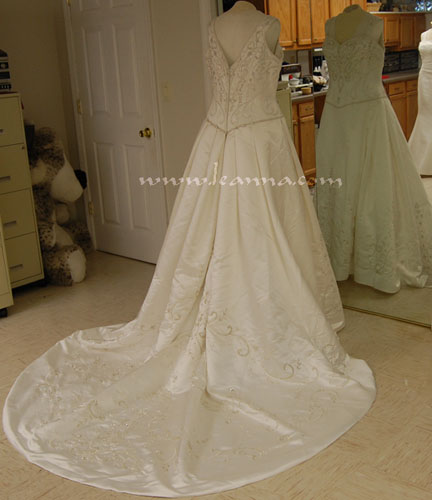
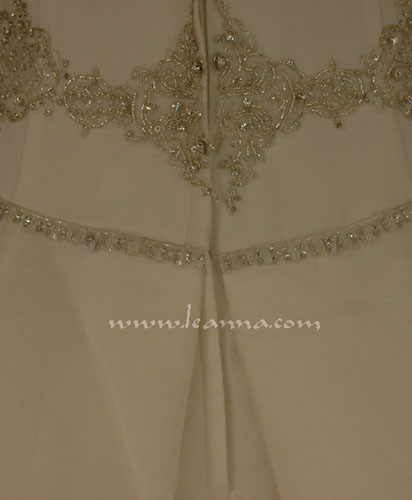
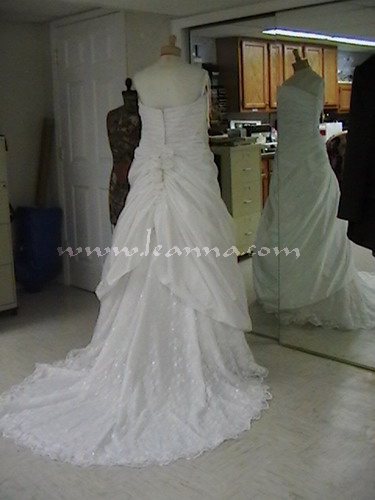
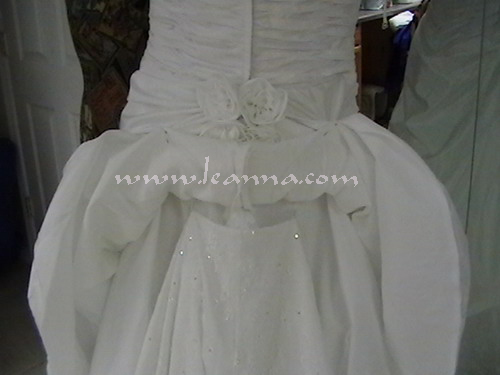
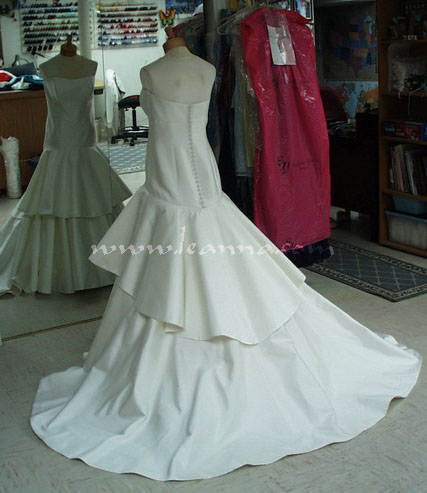
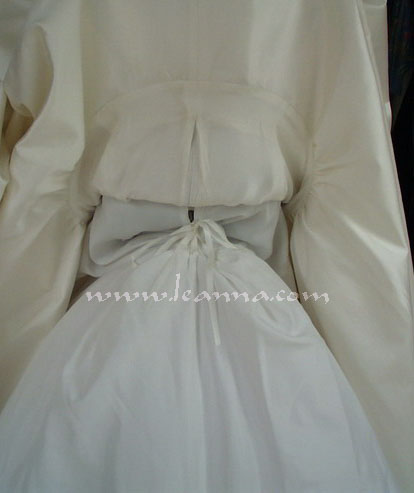
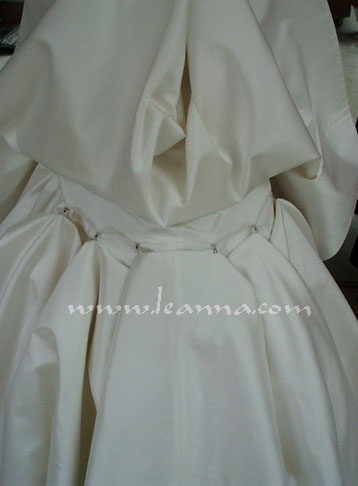
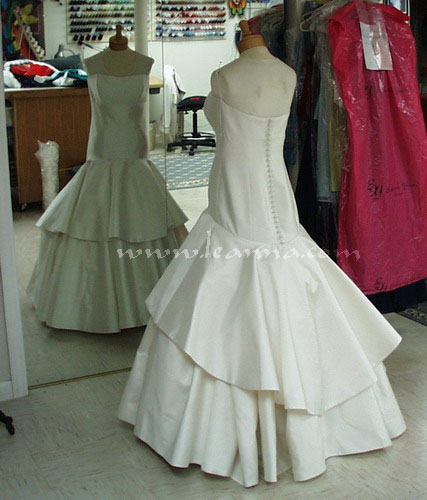
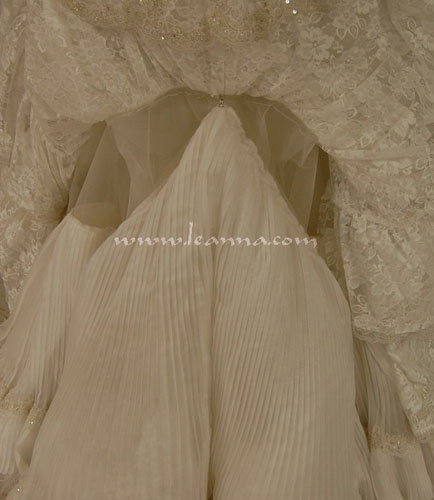
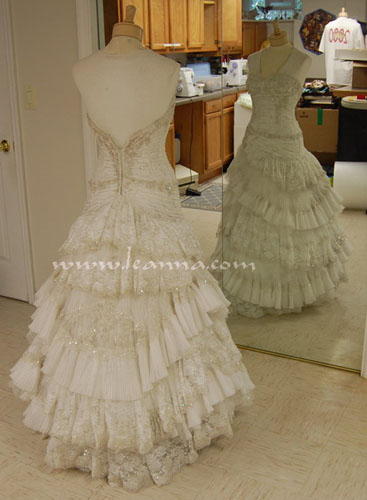
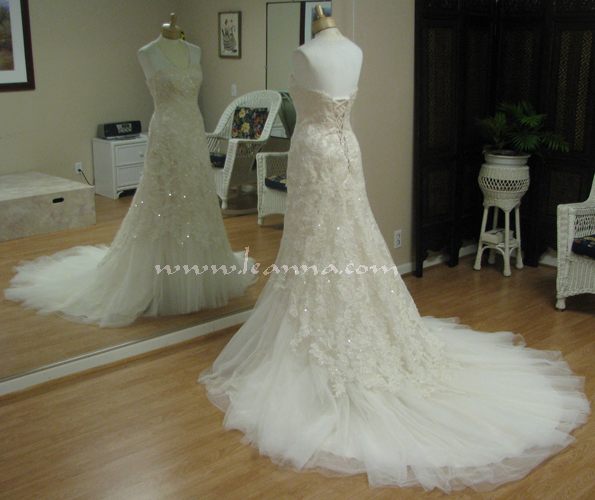
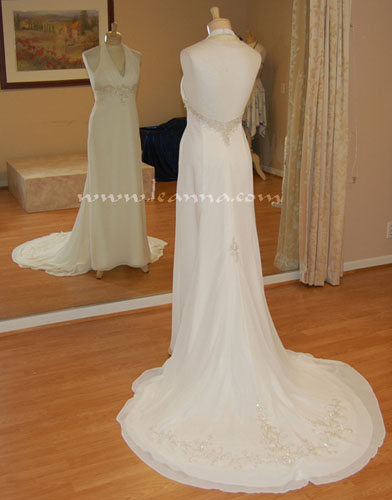
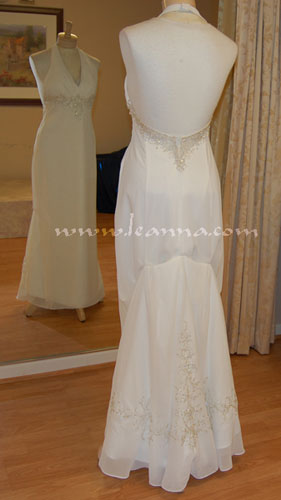
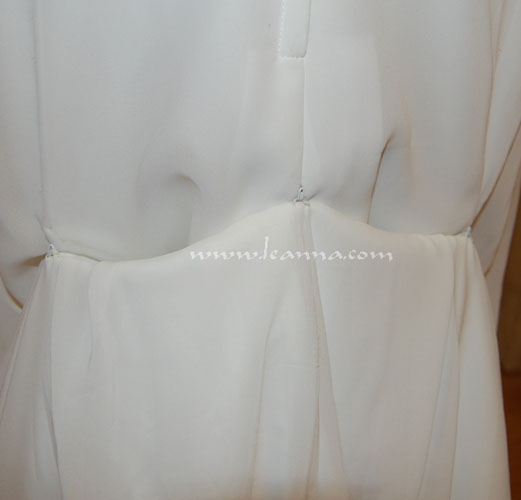
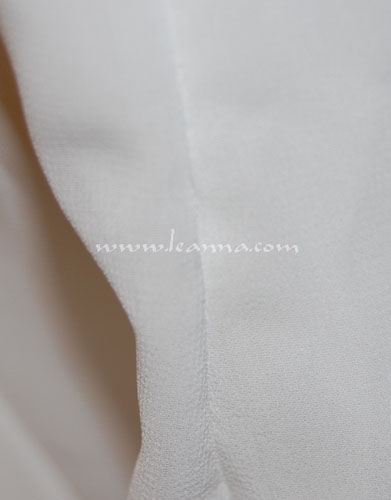
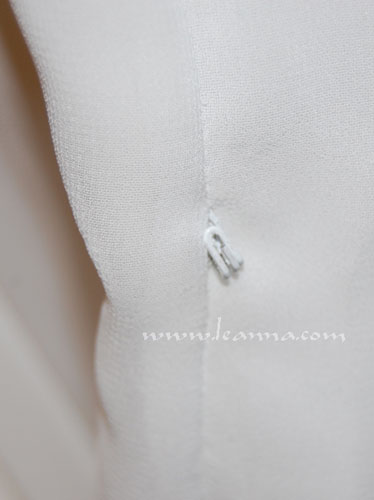
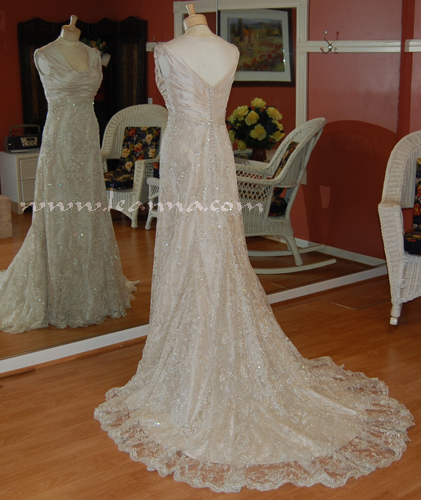
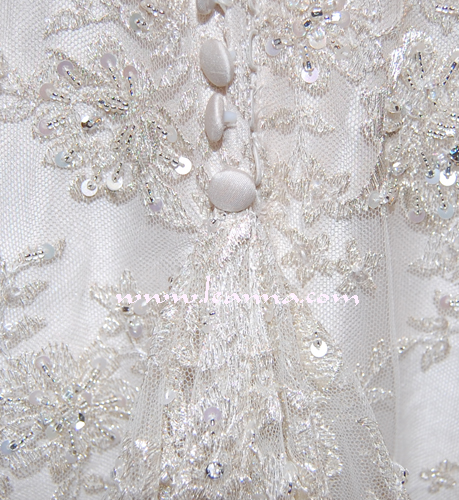
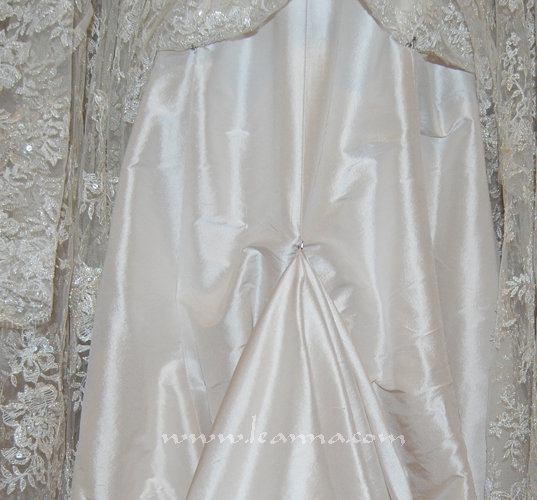
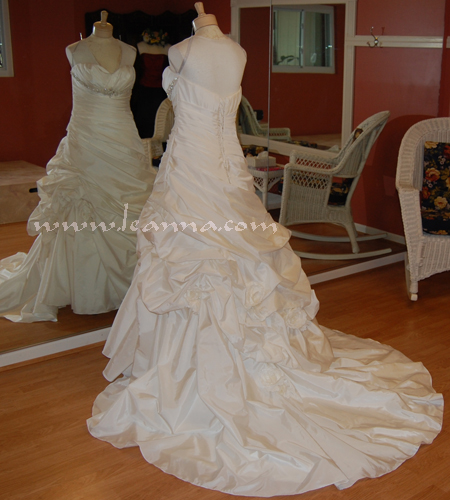
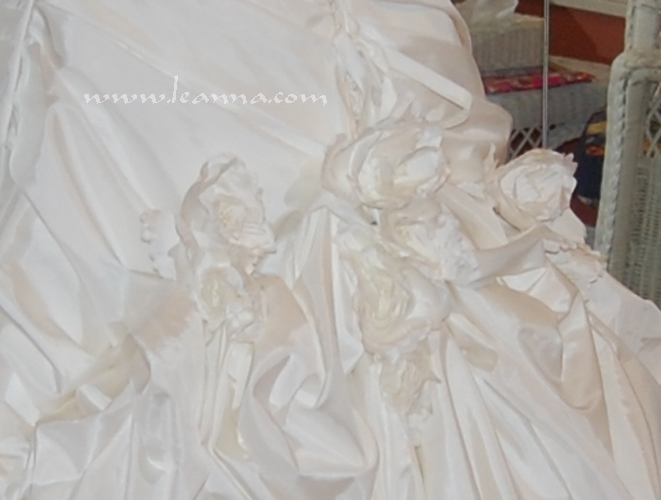
This gown is bustled in the Ballroom style using buttons for it's 2 anchor points.

This is the same 2 point bustle using button anchors, but the bride requested that I set it low so all the lacings would be displayed.

This gown is basically the same with 2 button anchor points, but an extra loop is made in the center to attach to a zipper button for extra support. The bride wanted to showcase the lovely embroidery of the train.


This gown has a nice waist decoration to hide the bustle points so I used hooks instead of buttons. They are a little more stable than the satin covered buttons and you can make the loops on the train smaller and therefore less noticeable when the bustle is not up.

Though this is not the way I do it, here's a link to a site with sep-by-step instructions on how to make a Ballroom bustle:
http://www.sewdeb.com/bustle1.html


This gown has a small band at the waist seam that we decided could nicely hide white hooks. I normally prefer to use covered buttons when there is no big bow to hide the hooks but this worked out nicely.


Here are 2 pictures of the back of the gown before and after bustle rigging. The hooks are there but they are mostly tucked under the band of beading.


This Ballroom bustle is lovely.


This is the same 4 pointed Ballroom bustle but on a gown with decoration on the train. This bustle displays the decoration nicely.


This gown has two skirts. The train is formed on only the underskirt. This provides a unique opportunity to hide the bustle riggings for the train under the top skirt.


This gown posses an interesting bustling problem. The crinoline slip also has a train - a big one with lots of netting.


Once the crinoline is bustled, we can design the gown's train bustle. Using the Ballroom style we set the points on the lower skirt tier, totally hidden under the upper tier.

We decided to bustle the crinoline slip separate from the gown in a mock of the french style described below. Here the loops and ties are rigged on the top of the crinoline.

The result is an incredibly lovely and totally unnoticeable bustle.


This gown is much the same situation as above but I'm going to bustle this gown in several layers.

Because of the shape of the train, I used 3 pick-up point on the first layer to hold up the sides of the train.

One the second layer only 2 point were needed because the center was already sewn near where I needed it to be.

The third layer needed only one point to hold up the very end of the train.


This gown also has many layers but it is a little different from the others above in that the top layer will also need bustling. The tulle layers will be bustled together with the lining under the lace layer. Then the lace layer will have a one point pick-up that will create a pretty effect.


The underlayers need many points to get all that tulle up evenly. The eyes need to be sewn carefully to the tulle. I use white eyelets as backers to support the tulle because it is very delicate and mostly holes.


Once the tulle is rigged up, the top lace layer can be neatly bustled so the lace tendrils do not drag on the floor.


This gown presents a couple bustling issues. It could be easily done with a one point pick-up style, but that did not display the decoration at the edge of the train well. And, the sheer chiffon top layer makes hiding riggings even harder than usual. This 3 point Ballroom Bustle with rigging twist was a great solution that the brides loved.


Here's a close-up of the rigged bustle. You can see the riggings here. Most brides don't object to the riggings showing once the bustle is rigged. The difficult trick is hiding the riggings when the train is down for the ceremony.


Here is the secret to hiding the riggings. The hooks are sewn inside the french seam so they don't show at all when the train is down. Before rigging the bustle, the hook is pushed to the outside of the seam so the loops, that are sewn a the bustle points, can be hung on them.


Many bridal laces are hardy fabrics that can handle the weight that a bustle inflicts on the anchor points, but the lace this gown was made of was very delicate and would not have likes any kind of stress. So, the anchor hooks had to be sewn to the layer of fabric under the lace and inserted through the lace so the lace was not taking on any of the stress of the train's weight on the bustle.


For the central anchor, I used the last button on the zipper, reinforced as I usually do in these cases. Then the 2 side anchor hooks are sewn onto the satin under the lace and cleverly positioned so when they are threaded through a space in the lace, they rest under some of the beading for even more camouflage.


The satin lining had to be bustled separately for the same reason the hooks could not be sewn onto the lace layer. it is done with a simple one hook pick-up.


This was a fun bustle to create. Each point is set under one of the flowers on the train so that they did not get covered up by the bustle. It took some doing to get it to work, but eventually it did. The result was stunning.


Step-by-Step instructions for creating these bustles: https://www.youtube.com/watch?v=GCkhWvI0y_4&t=1107s

Back to Main Bustle page


EmailLink

Got any questions or comments?


Bridal Advice SSI
Bridal Index | Bridal Shopping Rules | More Shopping Rules | Bride's Maid Shopping Rules | Strapless Gown 101 | Store Policies | My Policies | Bridal Fittings | Alteration Cost | Bustles | Impossible? | Bride & Salon Advice | General Q & A | Bustle Q & A | Bridal Related Links | Bridal Business Studio

Main SSI

Got any questions or comments?

home
The Bridal Studio Beautiful Bustles The Home Pro Studio Duct Tape Double Dress Forem Studio

This site created and maintained by: Leanna Studios
© Copyright 1994 by Leanna Studios. All Rights Reserved.